Showing posts with label tutorial. Show all posts

Saturday, September 1, 2012

Celebrity Inspired Makeup - Marilyn Monroe

Hi everyone. I want to start a new series where I do Celebrity Inspired Makeup Looks. To start off I will be doing a makeup look inspired by Marilyn Monroe.


http://www.all-art.org/photography/Vintage%20_photography-m1.html


I did a makeup look that I could get to look as close as possible to Marilyn's makeup but just keep in mind that it is an inspired makeup look so it does not look exact because I do not have the exact products that Marilyn uses. That being said... Lets get started!

1. Prime your eyes- I used MAC's paint pot in Soft Ochre


2. Use a skin toned color all over the lid and up to the brow bone- I used MAC's Brule


3. Next, I used a light brown color in the crease to add dimension- I used MAC's Soft Brown


4. Now used a darker brown color and apply it to the outer corner- I used MAC's Brown Down


 5. Now use a liquid eyeliner to create a winged line like MArilyn has- I used Revlon Colorstay (a felt- tipped)


6. Mascara Time!


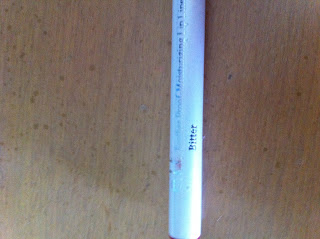
7. Now line your lips with a red color- I used ELF's Bitter


8. Next, use a red lipstick and apply it to you lips- I used Shiseido's Berry Sheer


I hope you enjoyed and leave a request in the comments for another celebrity inspired makeup look. If you want a specific look leave the link in the comments!

xoxo
Cami

Monday, December 12, 2011

How to: French Manicure

Hey everyone! I have a post for all of you on a super simple way to do a french manicure! It is so easy and quick. I think the french tips just give a clean look perfect for a special occasion or just everyday! Ok so lets get into the post!


What you will need:


1. Nails (obviously)
2. White polish
3. Clear polish
4. Reinforcements
5. Tape (optional)
6. Scissors


Lets begin!


1. Start off with clean nails.
2. Get your reinforcements and cut them in half, like so


3. Place them on your nails a little away from your tip like I did in the picture and if they don't stay feel free to tape them


4. Paint the white on your tip (it is ok to over lap the reinforcers) 


5. Wait 5 minutes for it to dry
6. Once it is dry then peal off the reinforcer and you should have a white tip


7. If it is a little messy feel free to use a cotton swab and nail polish remover to clean u the edges also touch up the white if necessary
8. Paint on your clear polish and let them dry


9. You have finished! If they do not turn out perfect the first time do not get discouraged because practice makes perfect! 
Mine are not perfect but I have been practicing!


I hope you all enjoyed if you have any questions feel free to leave them in the comments and if you try them out feel free to do a NPOTD (nail polish of the day) and let me know about it in the comments! I will gladly check it out.


Caution! Caution! This is a little bit of a rant/ ramble! haha
I just wanted to tell all of you how thankful I am to those of you who follow me and comment on my posts because it really truly brightens up my day! Even saying something like, "I love your blog! or I love this post!" Might not be much to you but I really love it so yeah! Let me know what you think!


xoxo
Cami